NUnit 3 Tests for .NET Core RC2 and ASP.NET Core RC2
Update 2: The switch from the project.json format to the new csproj format and the associated tooling changes made the dotnet-test-nunit adapter obsolete by switching the test adapter API. I have released an update to the NUnit Visual Studio Adapter that implements the new test API and supports .NET Core. If you are using Visual Studio 2017 and/or the new .NET Core tooling, see Testing .NET Core with NUnit in Visual Studio 2017.
Update: I have released beta 1 of dotnet-test-nunit which has been updated to the RTM of .NET Core 1.0. I have updated this post and the code on GitHub to reflect the changes.
The NUnit team has been working hard since .NET Core RC2 and ASP.NET Core RC2 was released last month to add full NUnit testing for .NET Core, and we are happy to announce the second alpha release of dotnet-test-nunit.
In my previous blog posts, I explained how to use NUnit to test .NET Core using NUnitLite which worked, but was not the ideal solution. The new dotnet-test-nunit allows you to test from the command line using the dotnet test command and allows you to run your tests within Visual Studio.
The code from this post is on GitHub and is based on the code from my previous post.
Create a .NET Core Project
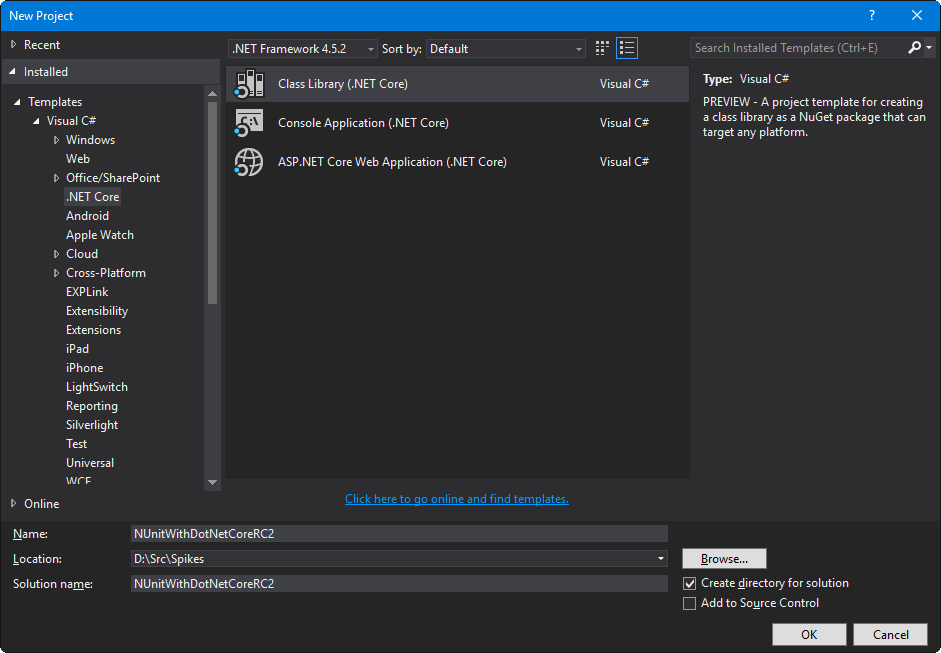
In Visual Studio, File | New | Project... and select Class Library (.NET Core) under the new C# | .NET Core node.

This it the code under test. To this, I have added the simple calculator class from the last post.
public static class Calculator
{
    public static int Add(int x, int y) => x + y;
    public static int Subtract(int x, int y) => x - y;
    public static int Multiply(int x, int y) => x * y;
    public static int Divide(int x, int y) => x / y;
}
Create an NUnit .NET Core Test Project
If you look in global.json, the new standard is to put your code in src and tests in test directories. To conform with this, add a New Solution Folder named test.
{
  "projects": [ "src", "test" ],
  "sdk": {
    "version": "1.0.0-preview2-003121"
  }
}
To this new test folder, add another Class Library (.NET Core) as your test project and edit the project.json based on the following;
{
    "version": "1.1.0-*",

    "dependencies": {
        "NUnitWithDotNetCoreRC2": {
            "target": "project"
        },
        "NUnit": "3.4.0",
        "dotnet-test-nunit": "3.4.0-beta-1"
    },
    "testRunner": "nunit",

    "frameworks": {
        "netcoreapp1.0": {
            "imports": [
                "netcoreapp1.0",
                "portable-net45+win8"
            ],
            "dependencies": {
                "Microsoft.NETCore.App": {
                    "version": "1.0.0-*",
                    "type": "platform"
                }
            }
        }
    }
}
Under dependencies, NUnitWithDotNetCoreRC2 is the project reference to the project under test. There are also dependencies on NUnit and the new dotnet-test-nunit.
After the dependencies, we specify that we want to use NUnit for testing with the line "testRunner": "nunit".
Under frameworks, we need to add to the imports because NUnit is still a PCL assembly. The .NET Standard (netstandard) version of the NUnit Framework won't likely be ready until the 3.6 release this summer. We are waiting until after the final .NET Core release to start that work.
Add Tests
Next, you can add your tests to the project by adding a new class;
using NUnit.Framework;

namespace NUnitWithDotNetCoreRC2.Test
{
    [TestFixture]
    public class CalculatorTests
    {
        [TestCase(1, 1, 2)]
        [TestCase(-1, -1, -2)]
        [TestCase(100, 5, 105)]
        public void CanAddNumbers(int x, int y, int expected)
        {
            Assert.That(Calculator.Add(x, y), Is.EqualTo(expected));
        }

        [TestCase(1, 1, 0)]
        [TestCase(-1, -1, 0)]
        [TestCase(100, 5, 95)]
        public void CanSubtract(int x, int y, int expected)
        {
            Assert.That(Calculator.Subtract(x, y), Is.EqualTo(expected));
        }

        [TestCase(1, 1, 1)]
        [TestCase(-1, -1, 1)]
        [TestCase(100, 5, 500)]
        public void CanMultiply(int x, int y, int expected)
        {
            Assert.That(Calculator.Multiply(x, y), Is.EqualTo(expected));
        }

        [TestCase(1, 1, 1)]
        [TestCase(-1, -1, 1)]
        [TestCase(100, 5, 20)]
        public void CanDivide(int x, int y, int expected)
        {
            Assert.That(Calculator.Divide(x, y), Is.EqualTo(expected));
        }
    }
}
Running Your Tests
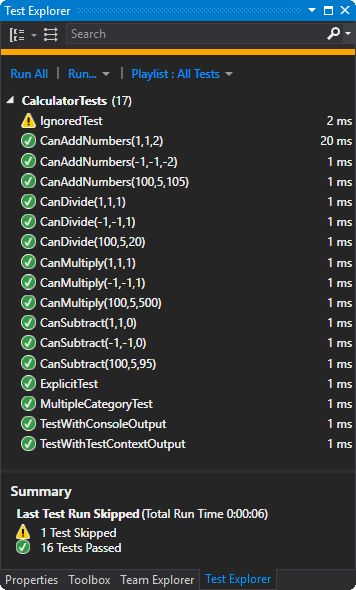
Now you can run your tests in Visual Studio, or from the command line. In Visual Studio, you may need to reload the solution before your changes are picked up, then your tests will appear in Test Explorer after you build the solution.

In addition, use the following commands to run your tests from the command line;
# Restore the NuGet packages
dotnet restore

# Run the unit tests in the current directory
dotnet test

# Run the unit tests in a different directory
dotnet test .\test\NUnitWithDotNetCoreRC2.Test\
Notes
Since this is an alpha release, so there are still likely bugs, but it is already being used by some large open source projects so is likely stable for production. Please report any bugs or issues to the dotnet-test-nunit repository on GitHub.
Finally, the dotnet command line swallows blank lines and does not work with color. The NUnit test runner's output is in color, but you won't see it. These are known issues with the dotnet CLI and not an NUnit bug.