Installing Ruby on Rails on Windows
I have been planning on learning Ruby on Rails for awhile now, but I have heard that running it on Windows was problematic. The download page makes it sound pretty easy though, so I thought I would give it a try.
Install Ruby
First we need the Ruby language itself. I picked up the 1.9.1 windows installer from RubyForge. When I installed, I checked Add Ruby executables to your PATH and Associate .rb and .rbw files.

Install Ruby Gems
Update: Luis Lavena mentions in the comments that you do not have to install Gems because it comes with the installer which contradicted the installation instructions on the site I was using. I just tried installing on a new computer and Luis is correct. Just to be sure, I updated Gems with 'Gem update Gem'.
Next, we need the Ruby package manager which allows us to install Rails and other Ruby packages. Download and extract the latest Ruby Gems ZIP file from RubyForge.
Open a DOS command prompt where you unzipped Gems and run the command,
ruby setup.rb</code>
Install Rails
At the DOS prompt, run
gem install rails</code>
Wow, that was easy! Next, create an application and try it out.
Install MySQL Driver
Slow down, not so quick. A few steps ahead, I discovered that the MySQL driver is no longer distributed with Rails 2.2, so I had to install it with the command
gem install mysql</code>
You may also run into a problem later when you try to run db:migrate and it says Not Connected. If you do, follow the steps in this post, they got it working for me.
Initializing an Application
To start out, I am going to run through the screencast Creating a weblog in 15 minutes with Rails 2, so I will create the application for that. Once again, at the command line, first cd to your test web root. I use XAMPP for web development on Windows, so I am going to keep my Rails apps there.
cd \xampp\htdocs
rails -d mysql blog
cd blog</code>
The rails command created the blog application to use MySQL as the database. Next open the blog\config\database.yml file. Update the username and password where appropriate. Now let's try it.
ruby script/server</code>
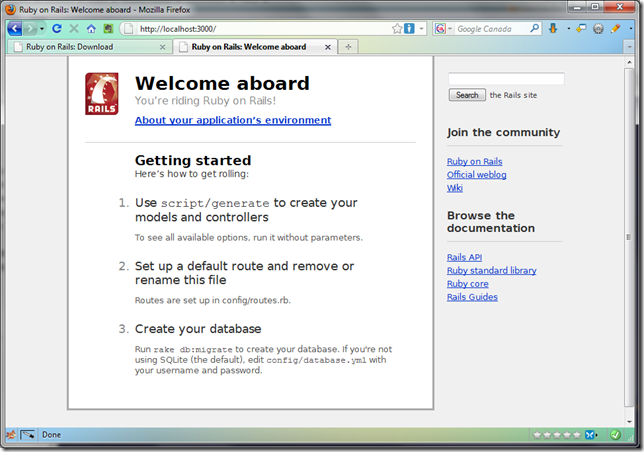
The ruby command runs a development server on port 3000. If you see the Windows Firewall prompt, allow it. Test the installation by going to http://localhost:3000, you should see the following.

What about Apache?
Once again, I am using XAMPP, so I tried several ways to get it working, but never managed to get either the mod_rewrite and/or the CGI handlers working. I found quite a few tutorials. All got me to the Welcome Aboard page, but none actually worked when I clicked the About your application's environment link. I guess for now I am going to have to stick with the built in WEBrick server.
Next Steps
We are now setup and configured, so what next?
- View the various Rails screencasts. As I said, I am starting by following along with the Creating a weblog in 15 minutes with Rails 2 screencast.
- Learn more about the Ruby programming language.
- Read through the Rails documentation.
- Check out the Rails extensions that may make your projects go quicker.
- Don't forget Unit Testing
General Impressions
The general installation was easy, but I ran into several problems like the setting up Apache on Windows and getting MySQL working. At the bottom of the article Roadmap for Learning Rails, it states,
When you're first starting out, don't make unusual choices, such as learning to program Rails on Windows. One of the strengths of Rails is the community, but if you've made unusual choices, you'll quickly find yourself without much help.
In my opinion, Rails is not suitable for production deployment on Windows and probably anything beyond casual development is probably better on Linux or a Mac. If I stick with it, I will probably move all of my development over to Linux.