Automate Shutting Down Azure VMs
As I am developing, I create and use quite a few Microsoft Azure services and virtual machines. If I forget to shut down the services at the end of the day, it will quickly burn through my MSDN Azure credits leaving me dead in the water until the end of the month.
This happened to me last month and I vowed never again, so I dove into Azure Automation Accounts to automatically shut down services at the end of the day. The setup wasn't intuitive, but it can be really useful for cleaning up, or any scheduled maintainance of your account. Just make sure you don't end up taking down production services by mistake!
Create an Azure Active Directory Account
If like me you use multi-factor authentication for your Azure account, you cannot use your account to run automation scripts. Instead, you will need to create an Azure Active Directory account to run the automation scripts. If you are not using multi-factor authentication, you should consider switching, but if not, you can skip this and use your own account when setting up the credentials in the automation account below.
You need to log into the Azure Portal using the account of the Service Administrator to add new users. If this is your MSDN Subscription, you are likely the Service Administrator, but if it is a company account, you can find the Service Administrator by logging in with your account, then going to Subscriptions. Click on the subscription you want to administer, then All Settings | Properties.
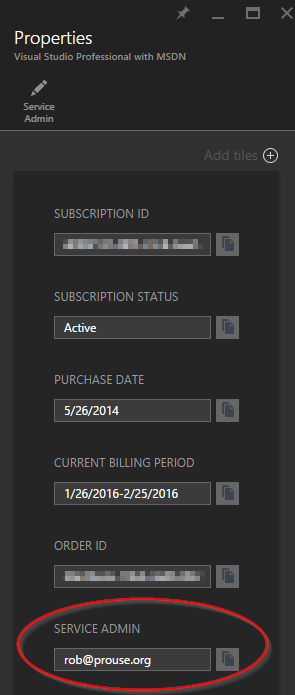
The bottom text box in the Properties blade is the Service Admin, log in with that account and click on Active Directory. This currently launches you into the classic portal.
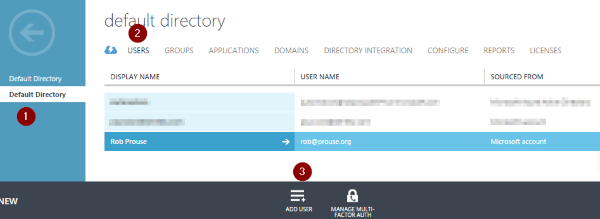
On the left, click on the Directory for the subscription, then on the USERS tab. If you do not see the directory listed, you are not the admin for the directory. Now click on Add User at the bottom.
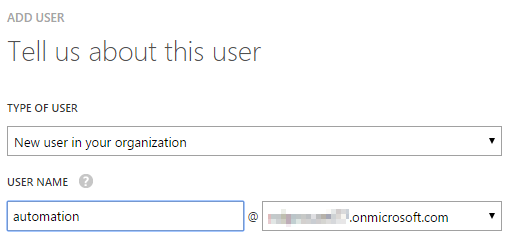
Select "New user in your organization" and enter a username for your automation user.
Click next and fill in the user information. The role should be User and don't enable multi-factor authentication.
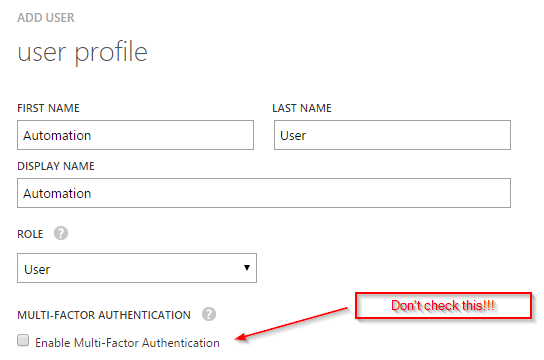
Click next, then Create to create the user and generate a temporary password for the user. Write down the username and the temporary password.
Since this is a temporary password, you must change it. Do this by logging out of Azure and logging back in with the newly created automation account. It will prompt you to change the password, do so, then log out and back in with your account.
Allow the Automation User to Manage your Subscription
Log back into the Classic Azure Portal with your user, click Settings at the bottom left, then Administrators.
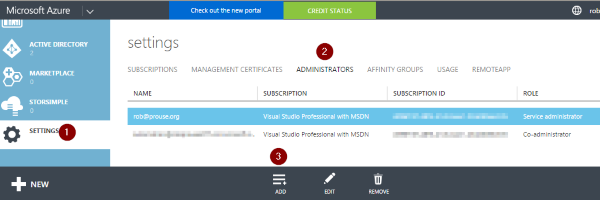
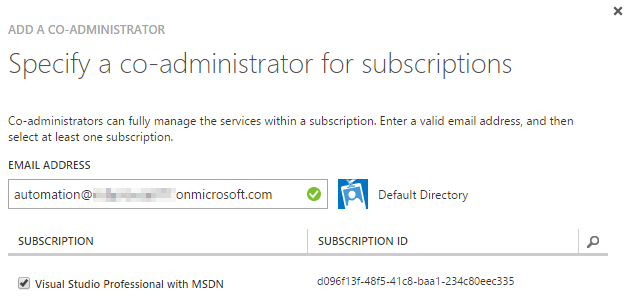
Enter the email for the user you just created and select the subscription they will manage.
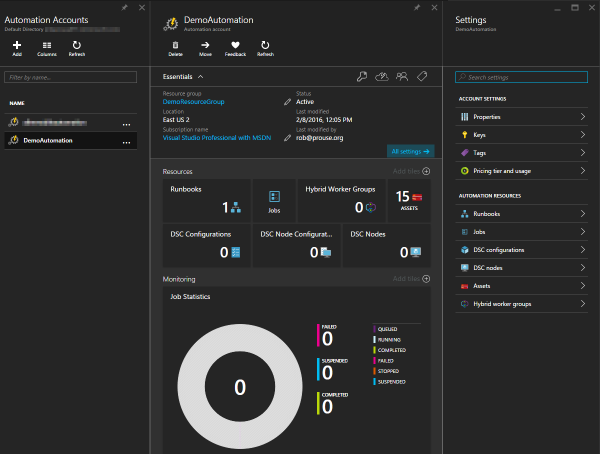
Create an Automation Account
Back in the Azure Portal using your MSDN Subscription account, click on Automation Accounts. On the Automation Accounts blade, click on Add.
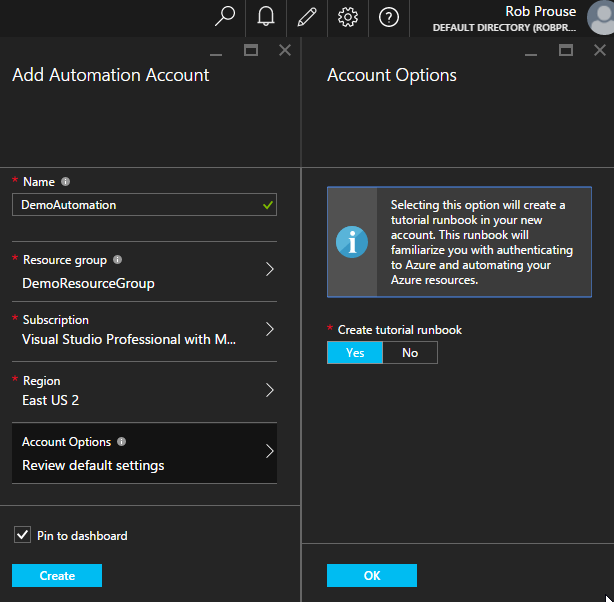
Give the new account a recognizable name. You will probably want to assign it to the same resource group as the services you are managing and select the same region. The default account options creates a tutorial runbook, leave it on, the code is useful to crib off of. When you are ready, click Create. After it is deployed, you will have a new automation account. Drill into it.
Add Credentials to the Account
Automation scripts need credentials to run under, so the first step is to add them. Click on the Assets tile, then the Credentials tile then Add a Credential.
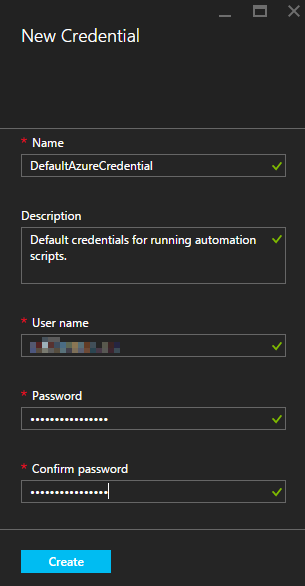
If you name the credentials DefaultAzureCredential then you you do not need to change the example automation scripts. If you prefer to use another name, you will need to change it in the automation scripts. For the username and password, use the automation user you created at the start of this post. If you skipped that and don't use multi-factor authentication I believe you can use your MSDN account.
Testing Your Setup
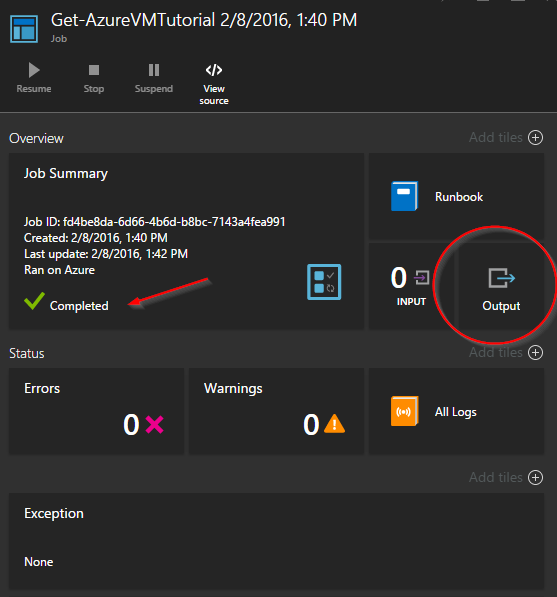
Close back out to the blade for your automation account and click on Runbooks. You should have a single Get-AzureVMTutorial runbook that was created when you created the account. We'll use this to test that you have the credentials setup correctly. Click on the runbook to open its blade. If you used DefaultAzureCredential for the credentials name, you can just press Start. If you used a different name, edit the script and change the authentication account where specified.
A job blade will open and the job will cycle through Queued, Starting, Running and if all goes well Completed. If it fails for some reason, then the an exception will be shown at the bottom of the blade and the job will become Suspended. If it does this, stop it. If it succeeded, click the output tile to see the list of classic VMs that it found in your subscription.
Time to write some code
If you peeked at the tutorial runbook code, you will see that it is just a PowerShell script. Time to create our own. I like to test what I am writing in the PowerShell ISE on my machine, but I will leave the setup of that to another blog post. For now, let's create a simple runbook to shutdown virtual machines.
Back on the blade for your automation account, click Runbooks and Add a runbook.
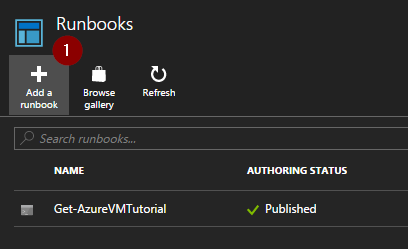
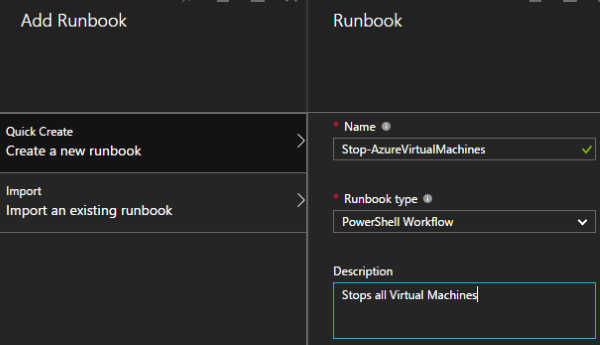
Create a new runbook called Stop-AzureVirtualMachines of type PowerShell Workflow and give it a meaningful description and click Create.
A new Workflow Runbook will open in the editor, copy the following code in;
<# .DESCRIPTION Stops all Azure Virtual Machines in an account. To stop classic VMs, change Get-AzureRmVM and Stop-AzureRmVM to Get-AzureVM and Stop-AzureVM .NOTES AUTHOR: Rob Prouse LASTEDIT: Feb 08, 2016 #>
workflow Stop-AzureVirtualMachines
{
  #The name of the Automation Credential Asset this runbook will use to authenticate to Azure.
  $CredentialAssetName = 'DefaultAzureCredential'

  #Get the credential with the above name from the Automation Asset store
  $Cred = Get-AutomationPSCredential -Name $CredentialAssetName
  if(!$Cred) {
    Throw "Could not find an Automation Credential Asset named '${CredentialAssetName}'. Make sure you have created one in this Automation Account."
  }

  #Connect to your Azure Account
  $Account = Add-AzureRmAccount -Credential $Cred
  if(!$Account) {
    Throw "Could not authenticate to Azure using the credential asset '${CredentialAssetName}'. Make sure the user name and password are correct."
  }

  #TODO (optional): pick the right subscription to use. Without this line, the default subscription for your Azure Account will be used.
  #Select-AzureRmSubscription -SubscriptionName "TODO: your Azure subscription name here"

  #Get all the VMs you have in your Azure subscription
  $VMs = Get-AzureRmVM

  # Stop each of the started VMs
  foreach ($VM in $VMs)
  {
      Write-Output ("Stoping " + $VM.Name)
      Stop-AzureRmVM -Name $VM.Name -Id $VM.Id -Force -ErrorAction Continue
  }
}
If you didn't use DefaultAzureCredential when you created the credentials, make sure you change it in the script. Also, if you have more than one subscription, uncomment the Select-AzureRmSubscription line. Notice that this script shuts down the new Azure Virtual Machines using the PowerShell commands with Rm in them like Get-AzureRmVM. If you want to shut down classic VMs or other services, modify accordingly.
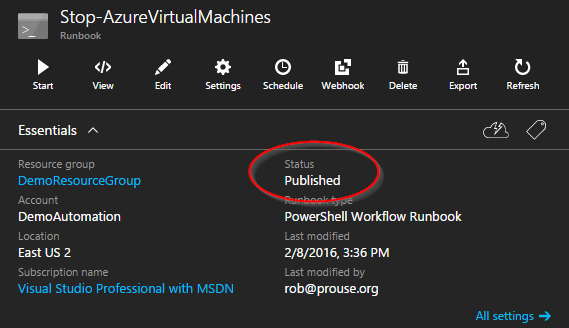
You can now test your script by clicking the Test pane button and starting your script. If you see any errors, make the necessary edits to get it running in your account. Once it is running, exit the test blade and click Publish.
After you publish the script, the edit blade should close. Back in the runbook blade, double check that the status is Published.
Scheduling the Job
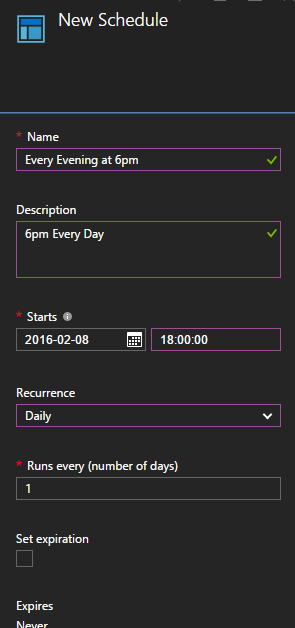
Last step, promise. In the blade for the runbook you just created, click the Schedules tile, Add a schedule, Schedule and Create a new schedule. Give it a name like Every Evening at 6pm, a description, a start date and time in the future and a daily recurrence. You can now exit out of the blades, you are done.
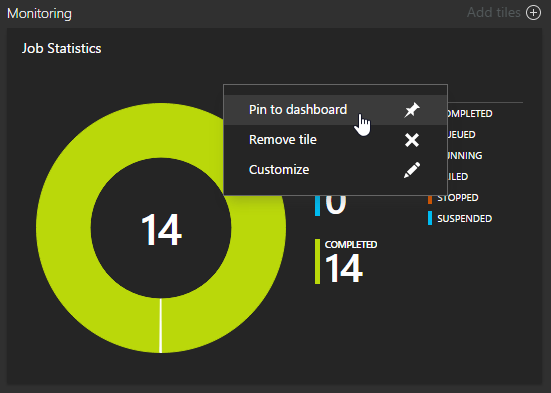
Monitoring your Jobs
Optionally, you may want to monitor the status of your jobs to make sure they don't start failing. Do do this, go to the blade for your automation account. There is a Job Statistics tile on that blade. Right click on it and pin it to your dashboard for easy viewing...