Installing Google Play Services (GAPPS) on Visual Studio Android Emulators
 Update: I have updated this post for 2017 here, I recommend that you read that instead.
I am developing a Xamarin application that displays maps. On Android, the map control requires that Google Play Services is installed, but most emulator images do include them. I mainly develop on Windows, so I have been using the great Visual Studio Emulator for Android. I prefer it because it is fast and uses Hyper-V. Other emulators like Xamarin's or GenyMotion use VirtualBox under the covers which doesn't work if you have Hyper-V enabled and I have had networking problems when it is installed and my laptop resumes from sleep.
Xamarin has a great article on how to install Google Play Services on their emulators, but it doesn't work with the Visual Studio Emulator. I then found the solution on StackOverflow written Vijay Sargunam. His solution worked perfectly, but was missing a few steps, so the following are my modifications to his work.
- Download the correct GAPPS for the Android version from http://www.teamandroid.com/gapps/
- Use the Additional Tools (small >> icon) for the emulator and go to the SD Card tab.
- Select a folder on your computer to sync with the virtual SD card.
- Pull from SD card, which will create a folder structure on the selected folder.
- Now copy the Gapps fill to the 'Download' folder.
- Push to SD card. This will take a little while, and copy the zip file to your emulator.
- Run a commmand prompt, and go to sdk\platform-tools in your Android SDK location and run adb devices.
- If you see the your emulator in the list, then skip to step 10.
- If you do not see emulator, run the following: adb connect
:5555</strong> You can find the emulator ip, from within the emulator, go to Settings -> About Phone -> Status and IP section.</li> - Next run, adb shell. This will give you a prompt to the android emulator.
- Confirm the gapps file is there: ls /sdcard/Download
- Now run, install_zip.sh /sdcard/Download/
.zip</strong> This should begin the flashing process.</li> - Once the flashing is complete, restart the emulator.
- Once you restart, you may see errors with apps like Google+ trying to start up, ignore them for now.
- Sign into your Google account and upgrade all apps from Google Play.
- When you run your application that requires Google Play services, you may be prompted to upgrade
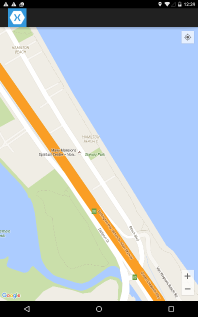
</ol>Voilá, maps running in the emulator!